Introduction - Why Google Cloud Platform?
GCP is currently a good and cheap option to host a Perforce Server.
Here I listet the main Pros and Cons I came over so far:
Pros: Google Cloud now offers only a 90-days free trial with 300$ Credits but a great
always free tier
which provides limited access to many common Google Cloud resources, free of charge.
If you want a hosted Perforce Server (or a website etc.), you can almost get along with this free content - forever.
The always free tier includes per month in selected Regions f.e.:
1 e2-micro instance
30GB HDD
1 static external IP address
The most other Host Platforms offer that kind of free tier only for the first 12 months (like AWS).
If you want to use it for Source Control with high quality gameprojects f.e. and you need more space, you dont pop out of that free tier when you exceed the free-diskspace-limit. you just pay for the additional space you reserve.
Currently you pay $0.04 for 1GiB/month.
The pricing system is pretty complicated, but you only pay what you are using.
Cons: The biggest downside are the costs of outgoing traffic. There are two service tiers:
standard tier: $0.085/GB from NA,EU
premium tier: ~$0.105/GB from NA->NA,EU->EU
Currently 1GiB in the premium tier is free, but if you have a lot of outgoing traffic going on, you might take a look at
Digital Ocean
wich has again other downsides, but a flat rate pricing system with outgoing traffic included.
For comparing purposes you may also take a look at
Microsoft Azure.
But the standard tier of GCP is still currently the cheapest outbound traffic pricing per GB (compared f.e. to AWS and Azure).
Step 1 - Setting up your Google Cloud Computing Virtual Machine
First of all you have to get familiar with the GCP Console, but I guess this is the easiest part.
Then you can watch this video video or follow along: Go to Compute Engine at the sidebar, VM Instances and than at the top Create Instance. After that you can play with the Settings:
Region: There are different prices for different regions, Iowa is one of the cheapest currently.
To apply for the always free tier you need to select instead of n1-standard the e2-micro and a region which offers it, to get the running costs free.
Boot Disk: Click change and select as much GB as you want and Ubuntu 18.04 bionic release.
Consider that more space does cost more.
Currently 30GB in selected Regions are free to use.
Static IP: If you want an IP, that does not change by restarting the VM you may select a
static IP. You can use one static IP address for free, as long as it is connected to a VM. For setup that you need to expand the Management, security, disks, networking, sole tenancy Menu at the very bottom, navigate to networking and then under network interfaces click on the default... button, to expand the network interface. There you need to modify the External IP by clicking on create IP address. Before selecting reserve:
Network Tier: Here you may also consider the
Network Service Level.
The incoming traffic ("Upload Traffic") is free, but the outgoing traffic ("Download Traffic") does costs f.e. in the standard tier about 0.085$ per GB. If you want the benefits of the google premium tier, you even pay more. More about this in the first chapter.
I recommend using your Start Credit to try several settings to see what works best for you.
Startup Script: If you want to install Perforce Helix Core automatically on your instance, you can refer to this chapter.
After that you can click create.
Step 2 - Tweaking the Firewall-Settings
Now there is the magic: You need to click on the 3 dots aside the
 Connect Button and then Click on Network Details. Then click on Firewall rules at the sidebar and create a new one.
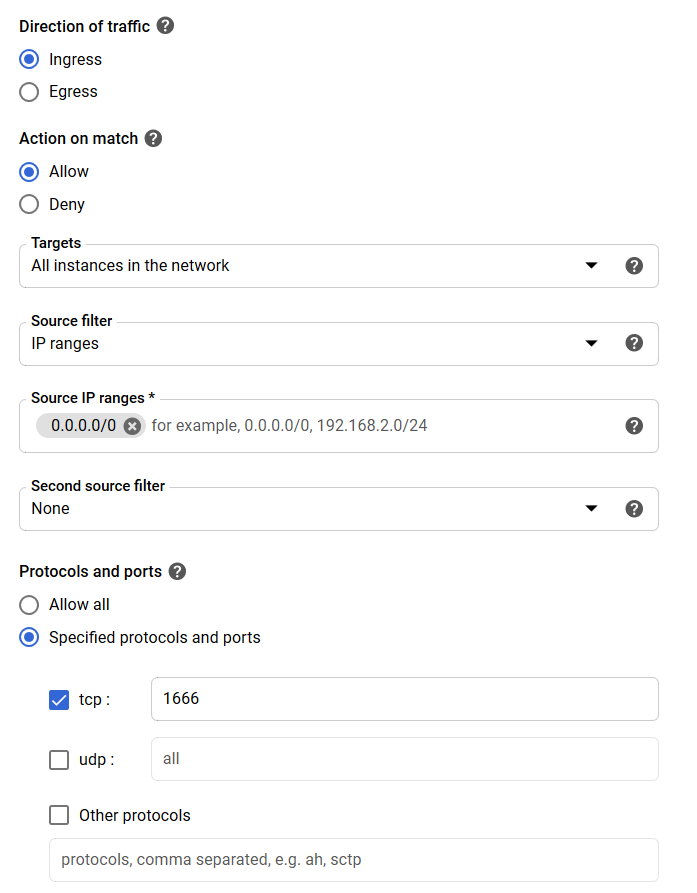
There you need to allow tcp at 1666 incoming and IP Range 0.0.0.0/0.
You may also select under Targets in the dropdown All instances in the network.
Connect Button and then Click on Network Details. Then click on Firewall rules at the sidebar and create a new one.
There you need to allow tcp at 1666 incoming and IP Range 0.0.0.0/0.
You may also select under Targets in the dropdown All instances in the network.
Then hit Save and you are done.
Step 3 - Install a Perforce Server with a Script
You can execute the script in two ways. After that you can proceed with accessing your Perforce Server with P4Admin or in this youtube-video I made at 11:00.
Your admin-username will be super, just like in the video, and your password will be ABCD1234.
Dont forget to tweak your firewall settings!
Startup Script: With a Startup Script you can automatically pre-install programs like Perforce Helix Core on your instance (before creating it) without having to use any command-line tool.
Expand the Management, security, disks, networking, sole tenancy Menu at the very bottom, navigate to Management and scroll down to the Startup script section.
to copy the code that you need to paste (Ctr-V) into the text-box underneath.
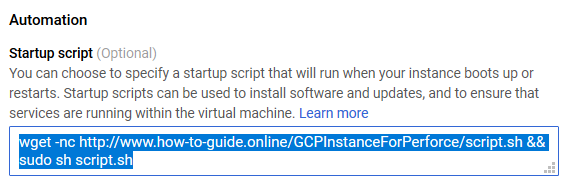
And thats it, when you hit Create Perforce will be installed automatically on your instance.
(This can take several minutes to complete after creation of the instance)
Execution via SSH-Terminal:This is another method that you can use when you allready created your instance. Open a terminal with a SSH-Connection to your created server instance. You can simply do that by pressing the  Button.
Then a window should pop up, like this:
Button.
Then a window should pop up, like this:
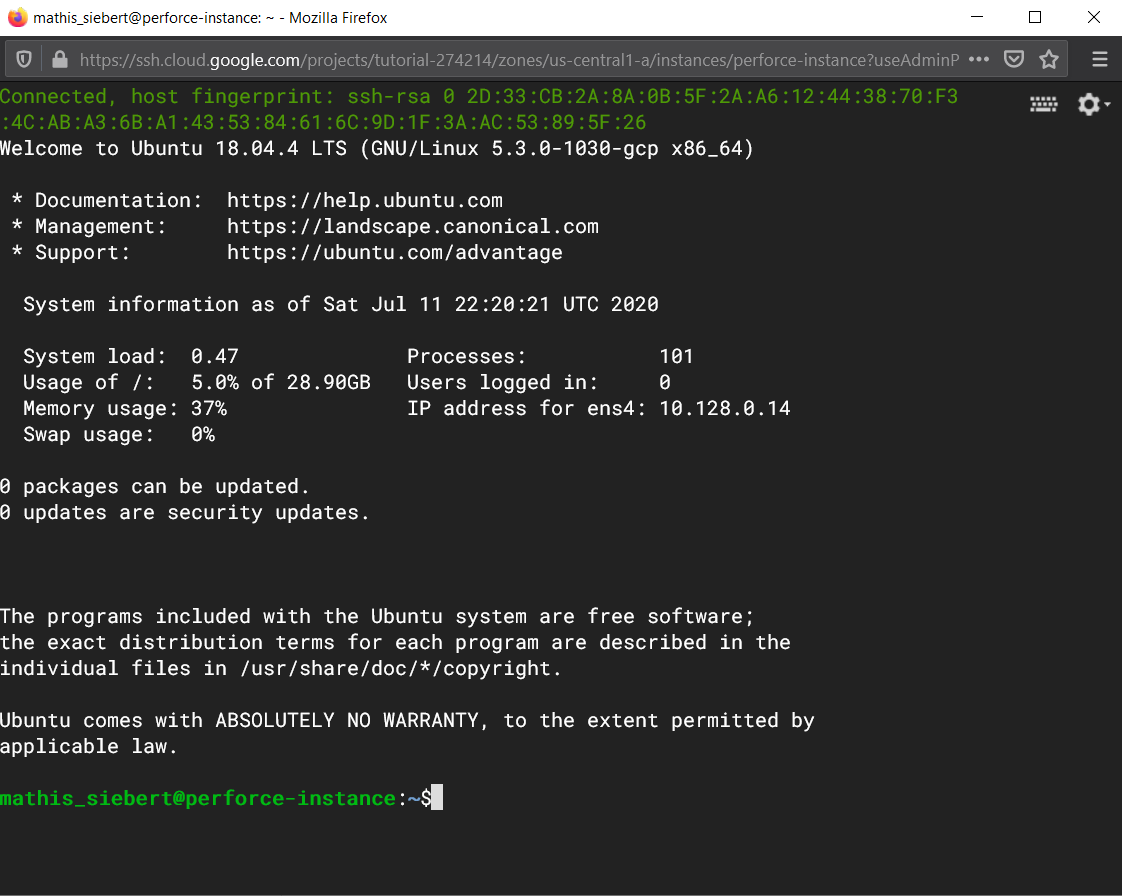
If it doesnt load up the first time just try it again.
you can copy the code that you need to paste (Ctrl-V) into the shell and then hit enter to run it. The script will fully install a perforce server for you!
When it has finished it should look like this:
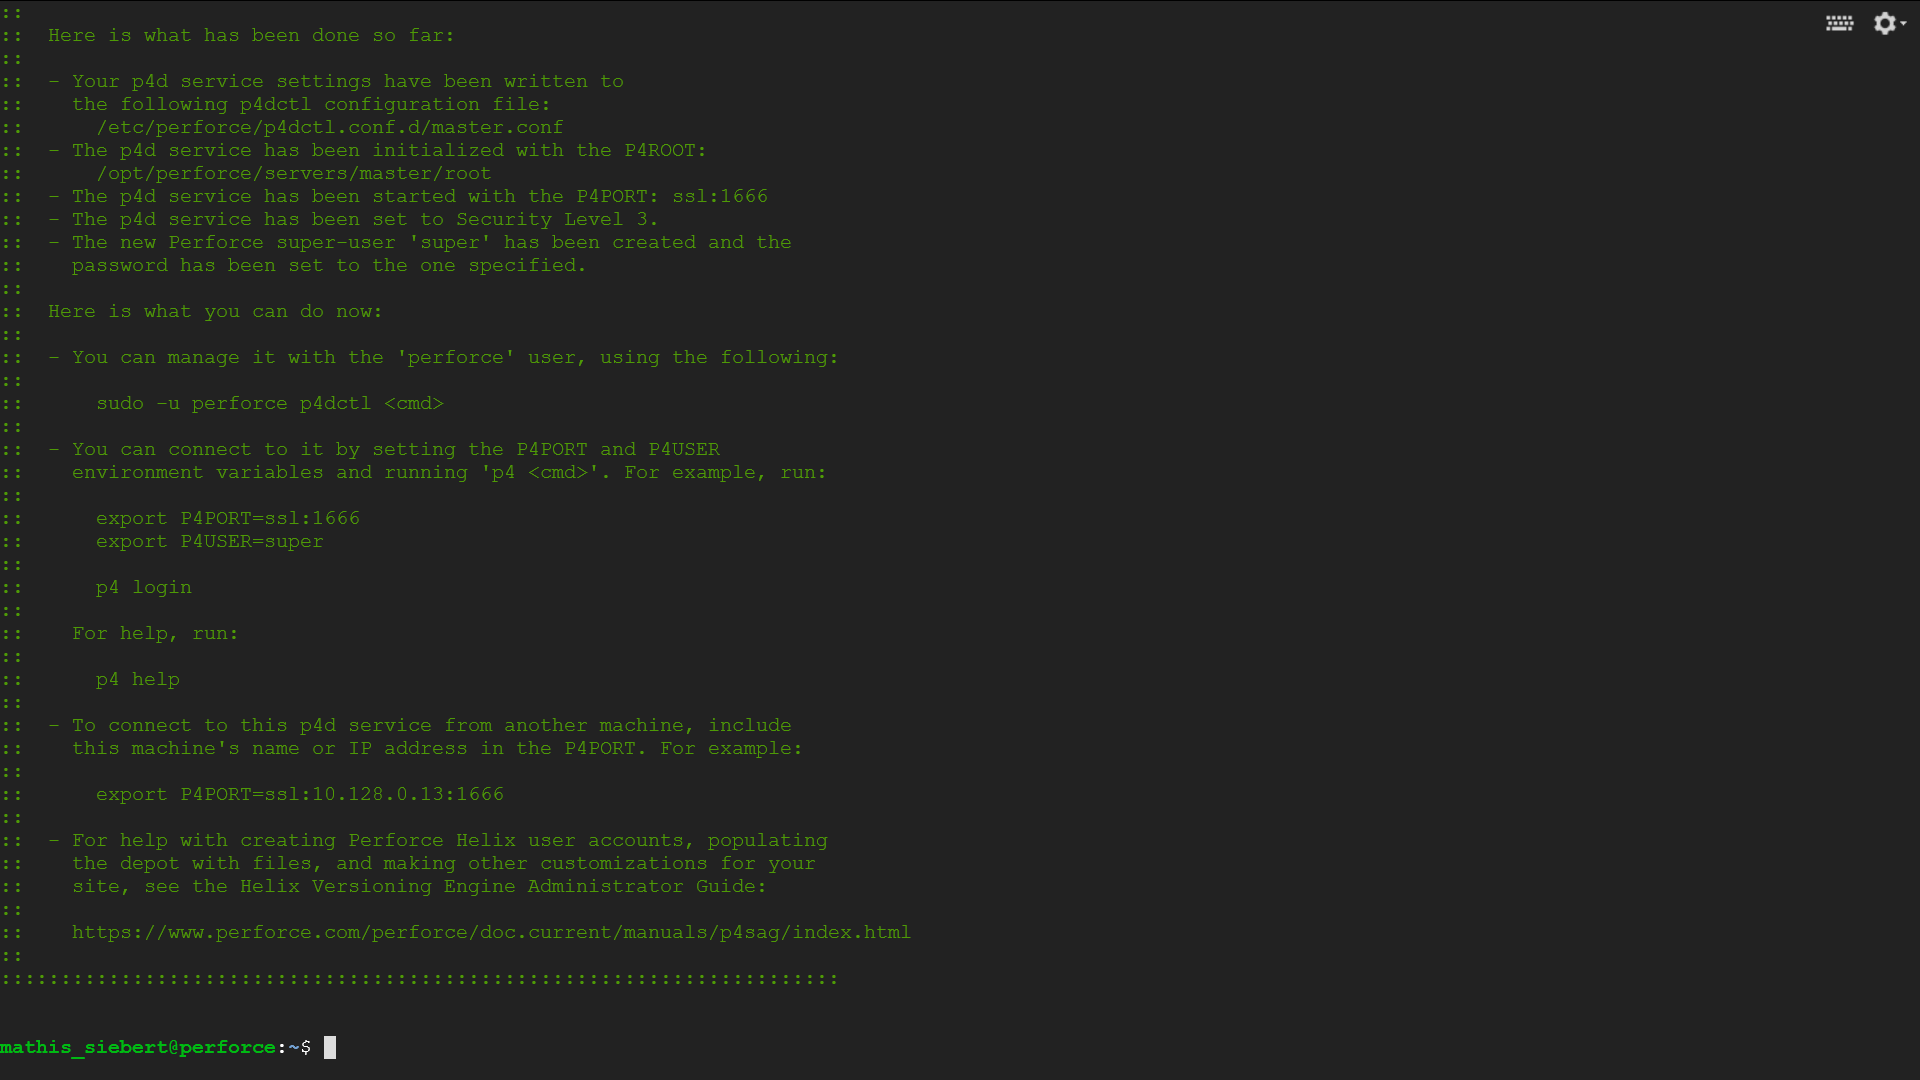
Then you can close the terminal. You have now Perforce successfully installed on your instance.
Step 3b - Guide for manual installation
If you want to do the installation by hand, this is for you:
I made a detailed tutorial
video on youtube on how to install Perforce on GCP.
You can just follow along.